BMWdiy.INFO
E39 M5 Liner Install
Prepared by VietSB
Modified 04.15.03
NOTE: Perform these steps at your own risk. All P/N's listed are a "best guess", so please double-check with your local dealer. These mods and repairs were performed on my US-spec 1997 540iA (11/96 prod date, M62 engine) but there is no guarantee they will work on other E39's. These instructions are provided for entertainment purposes only!
BACKGROUND: Upgrading to M5 liners is a possible solution for some of the rear wheel rubbing issues associated with lowering your E39 or adding wider wheels, especially in a staggered configuration. Having your fenders rolled is generally the first step, but many folks have found M5 liners a good second step. I haven't rubbed (yet), but decided to do both as a preventative measure against ruining expensive rubber.
Required Parts:
- P/N 51 71 2 496 657 Left M5 liner - wheel housing covering
- P/N 51 71 2 496 658 Right M5 liner - wheel housing covering
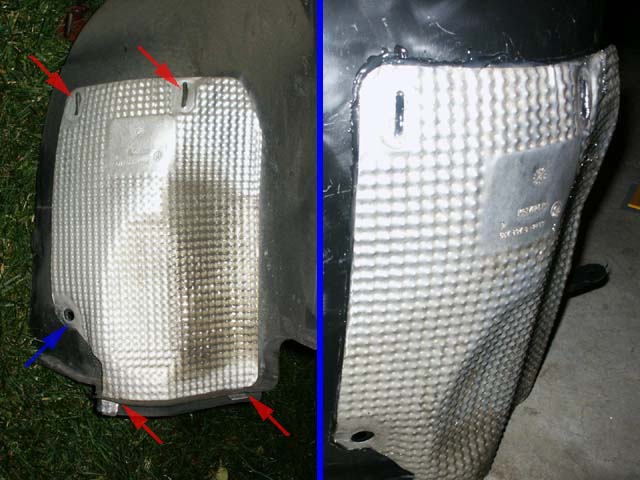
Here you can see how the shape of the M5 liner (left) differs to allow more clearance than the original liner (right).

Required Parts for vehicles with integrated Deflector Lip (see Step 2 below):
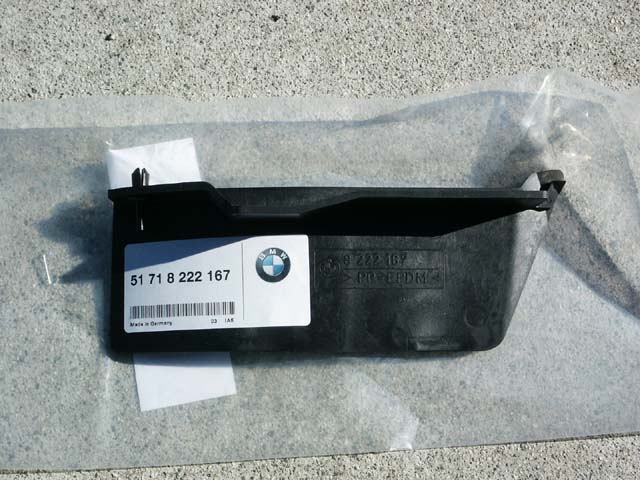
- P/N 51 71 8 222 167 Left door sill cover deflector lip
- P/N 51 71 8 222 168 Right door sill cover deflector lip
Required Tools:
- Small flat-head screwdriver
- Needle-nose pliers
- 1/4" ratchet, extension, 8mm, 10mm socket
- Wheel service tools
- Jack, jackstand, wheel chocks
Recommend Tools:
- Rubber gloves
- Dremel or equivalent trimming device
- Hot-glue gun or equivalent
- Work light
1. Remove the rear passenger-side wheel using the appropriate wheel service tools. Since you'll be working in the wheel well, be sure to work on level ground using a good jack, jackstand, and wheel chocks.
2. Remove the (2) 8mm screws towards the front of the wheel well (upper left pic). Notice that my original wheel liners had an integrated, small mudflap-looking extension off the front edge (see blue arrow). It's called a "Door Sill Cover Deflector Lip" and newer model E39's have it as a completely separate piece. You should examine your current liners and possibly order the respective P/N's listed above since the M5 liners don't have the integrated extension piece. Remove the (3) expanding rivets towards the back of the wheel well by using the flat-head screwdriver and pliers to pull out the center pins (upper right pic). Remove the (2) 10mm plastic nuts in the middle of the fender liner next to the shock (bottom pic).

3. Remove the 8mm screw on the underside of the liner.
4. Remove the liner by releasing the lip, working from back to front. It's usually very dirty, so that's where the rubber gloves come in handy. Use careful navigation and some strategic tugging to release it.
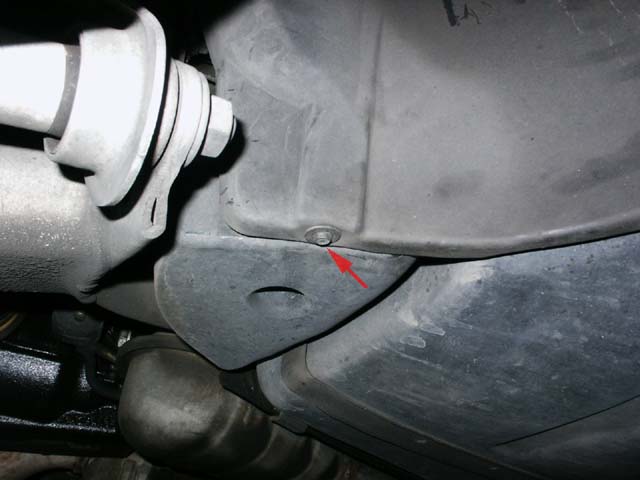
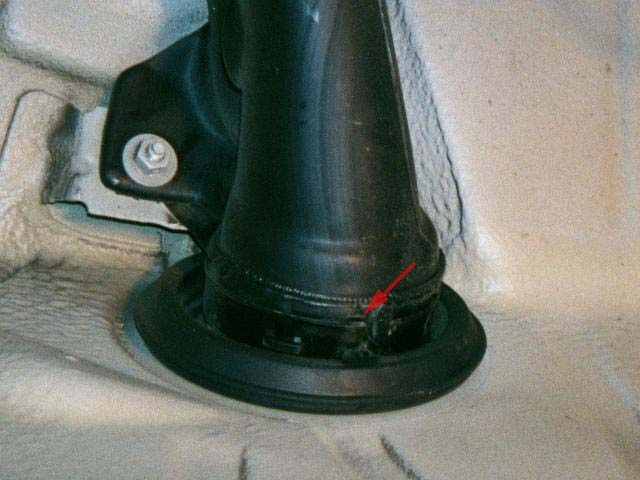
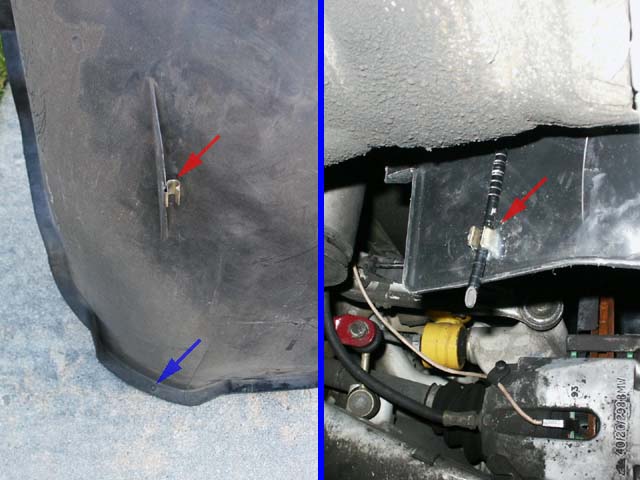
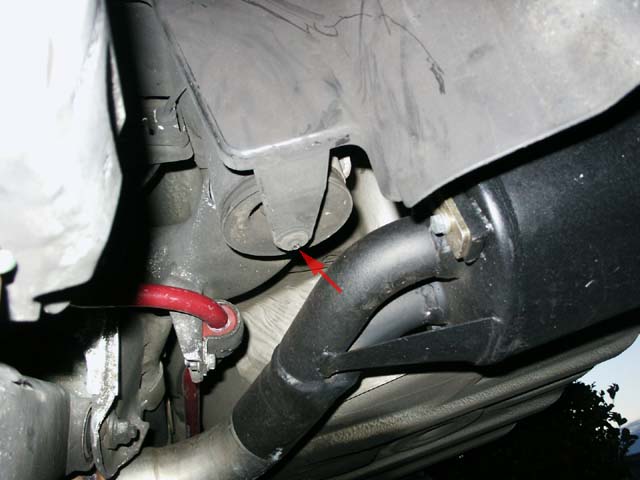
5. Pay special attention to the black plastic hose clipped to the fender liner (see Pic 1 arrow) and leading to the fuel filler overflow (see Pic 2 arrow). It should detach on its own from the fuel filler area.
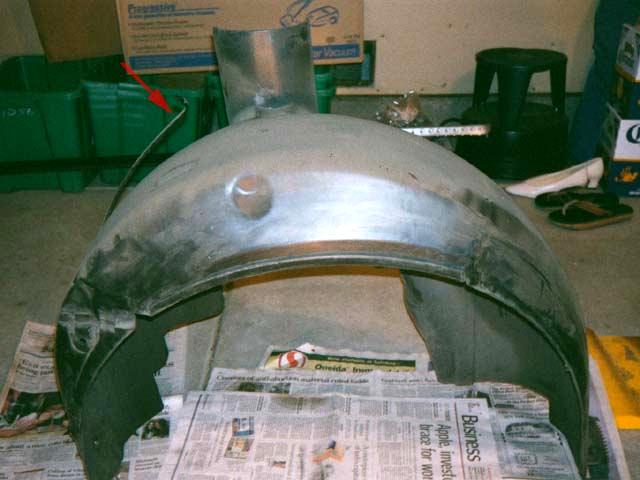
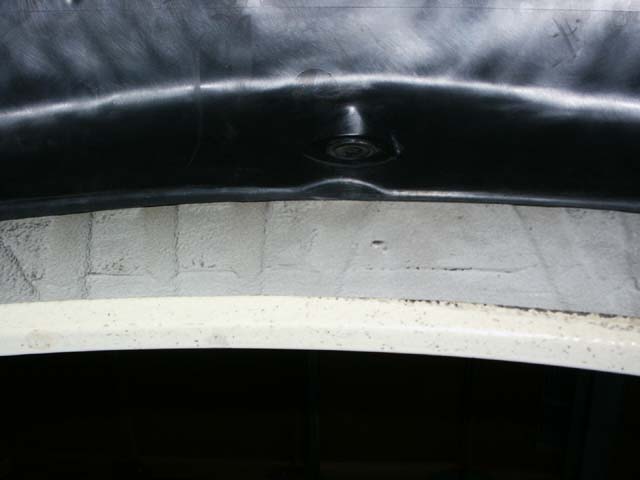
6. The original passenger-side rear liner had a metal clip (see left red arrow) and exit hole (see blue arrow) to guide the overflow tube. Since the M5 liner doesn't have this, I removed the metal clip and hot-glued it to the M5 liner so the tube will be secure and follow the original path (see right arrow). Connect the overflow tube back up to the fuel filler area and move it off towards the rear of the car for later installation.
7. Now comes the fun part - fitting the new liner in place. It is somewhat easier than trying to install a stock liner because it only needs to tuck into the rolled fender at the left and right edges, not in the middle. The first step is to guide the portion that goes into the shock tower as evenly as possible into position, while bending the bottom of the liner around the brake components. If the plastic edges catch part of the spring cap or something else up there, it won't seat properly. Once that is in place, it should be fairly trivial to get the center 10mm holes to line up and hang the liner on the two threaded bolts. To aid in centering on the bolts, I pounded upwards against the liner with my fist to be sure the liner was seated as high as possible. If they aren't lining up, you might need to pull it out, reseat, and try again.
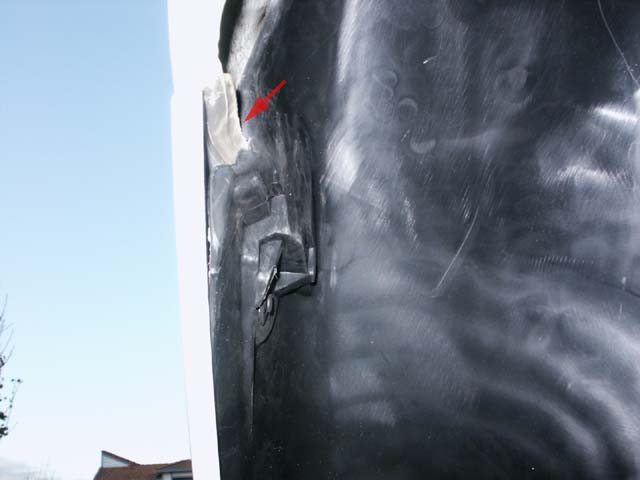
8. Roll the front portion of the liner into place and tuck the screw hole clip plate above the body piece.
9. The shape of the M5 rear bumper's leading edge must be slightly different than the standard bumper because the rear of the liner is close, but doesn't quite fit. I used a Dremel tool to grind away some of the plastic from the edge and underside for a perfect fit.
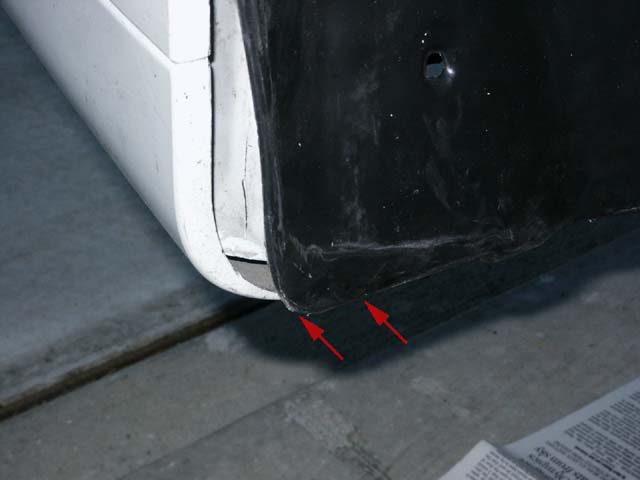
10. Roll the rear portion of the liner into place and tuck the newly trimmed portion into place. There is a small tab on the M5 liner that can be bent and tucked into the fender roll right where the metal body meets the plastic bumper. The red arrow shows where the tab is tucked into the metal roll.
11. Install all (3) 8mm screws. Please note that the bottom solo screw didn't fit quite right on the two non-M5 E39's I've installed these on. I had to push up a bit to get the screw to reach the hole, as you can tell by the slightly bent plastic pictured below.
12. Install the (2) 10mm plastic nuts, but don't over-torque and strip them. Double-check to be sure the overflow tube is still attached properly up top and install the (3) expanding rivets. Fasten the overflow tube into the glued metal clip.
13. This completes the passenger-side install. Check to be sure no part of the liner is touching any of the suspension or braking components. In the pic below you can see the view from inside the fender. Notice the extra clearance? Reinstall the wheel and torque to 88ft-lbs.
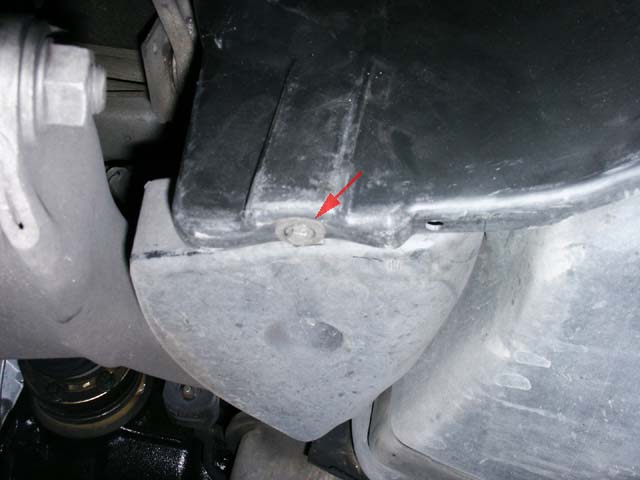
14. The driver-side liner has the same attachment points, with the addition of (1) expanding rivet pictured below.
15. The driver-side liner has a heat shield to protect from the OEM muffler. It is normally attached via clips and slots (see red arrows), but the new liner has no such provisions. The only common mounting point is a hole (see blue arrow) that one of the expanding rivets fits thru. I used the hot glue gun to affix the heatshield to the new liner in multiple places. I know high heat might melt the glue, but I don't think it'll get quite that hot. Besides, I don't really need the heat shield (see next Step), but those that do should inspect it on occasion to be sure it's holding up. Use the hole to line up the heatshield.
16. The rest of the driver-side installation is identical to the passenger-side.
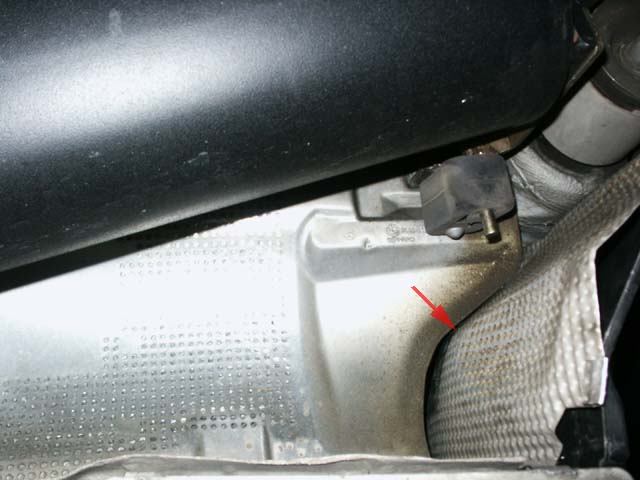
17. This picture shows the heatshield and liner to the right of it. Normally, with the OEM exhaust, there would be one of the double-barrel canisters right up against the heatshield, but my black aftermarket muffler completely avoids that area, so in actuality, the heatshield is not really needed in my application.
18. If you require fender rolling, click here for those DIY notes. If you require fender pulling/pushing for the troublesome rear passenger area, click here.
|
Questions? Comments? E-mail me:
|
 . .
|
Click Here to return to the Main Menu.

Optimized for 800x600 or higher resolution.
Copyright © Midnight Designs, 2002-2003. All Rights Reserved. All
images and registered trademarks are used to benefit and without intent to
infringe on the holder. Contents Subject to Change Without Notice.