BMWdiy.INFO
E39 Alarm Siren Replacement

Prepared by VietSB
Thanks to AlexPS
Modified 04.10.03


NOTE: Perform these steps at your own risk. All P/N's listed are a "best guess", so please double-check with your local dealer. These mods and repairs were performed on my US-spec 1997 540iA (11/96 prod date, M62 engine) but there is no guarantee they will work on other E39's. These instructions are provided for entertainment purposes only!


BACKGROUND: Always wanting my car to look and sound modern, I replaced my old "wolf whistle" alarm chirp with the newer "road runner" beep by upgrading to the newer-style siren. I'm including both P/N's in case someone wants to do the opposite.
Required Parts:

Required Tools:

Recommended Tools:


1. Be sure the alarm is disarmed since tampering with the siren on an armed car will probably trigger the alarm system. Disconnecting the negative lead from the battery might be a good precaution as well (which I didn't do).


2. Remove the rear passenger-side wheel using the appropriate wheel tools. Since you'll be working in the wheel well, be sure to work on level ground using a good jack, jackstand, and wheel chocks.
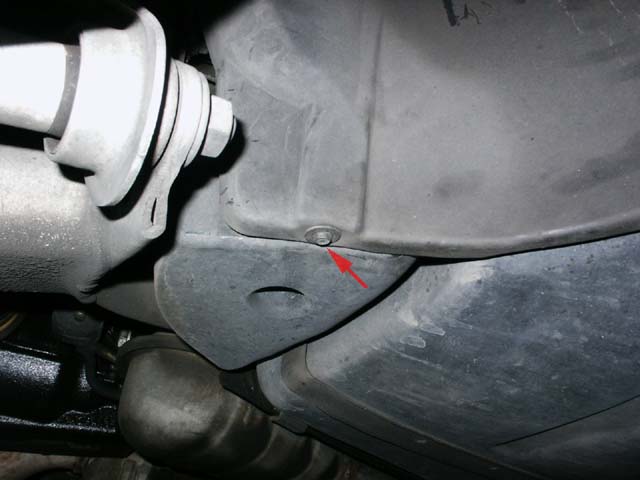
3. Remove the (2) 8mm screws towards the front of the wheel well (upper left pic). Remove the (3) expanding rivets towards the back of the wheel well by using the flat-head screwdriver and pliers to pull out the center pins (upper right pic). Remove the (2) 10mm plastic nuts in the middle of the fender liner next to the shock (bottom pic).


4. Remove the 8mm screw on the underside of the liner.


5. Remove the liner by releasing the lip, working from back to front. It's usually very dirty, so that's where the rubber gloves come in handy. Use careful navigation and some strategic tugging to release it.
6. Pay special attention to the black plastic hose clipped to the fender liner (see Pic 1 arrow) and leading to the fuel filler overflow (see Pic 2 arrow). It should detach on its own from the fuel filler area.


7. The original siren will be in the rear of the wheel well (Pic 1). Unplug the wiring harness and remove the (2) 10mm plastic nuts that hold the mounting bracket in place (see Pic 2 arrows). This will release the siren from the car.


8. Remove the 10mm nut holding the bracket to the back of the siren (see arrow).


9. Install the bracket onto the new siren. It is keyed so the bracket can only be installed one way.
10. Reverse the steps to install the new siren and reassemble the car. Don't over-torque and strip the plastic nuts.
11. Before installing the fender liner, I unclipped the black plastic hose from the side of the liner and connected it back up to the fuel filler overflow hole (Step 6, Pic 2). After I had the fender liner 80% in place, I clipped the plastic hose back to the liner and used a flashlight to be sure it was still attached to the fuel filler hole.

Questions? Comments? E-mail me: .

Click Here to return to the Main Menu.


Optimized for 800x600 or higher resolution.

Copyright © Midnight Designs, 2002-2003. All Rights Reserved. All images and registered trademarks are used to benefit and without intent to infringe on the holder. Contents Subject to Change Without Notice.